July 30, 2012

Baby Shoot - Almost....

Hi folks,

how's your Monday traveling so far?  Today was the big day for the Baby Shoot of my newest little Granddaughter - that was me as the photographer and... it was almost a success!

I did manage to get the frilly pants done following this post for a perfect diaper cover, I just added the frills.


Why was the photo shoot only an almost success... little Miss was wide awake with no intention of going to sleep.  This made for a very wriggly baby and of course trying to pose her was impossible...hahahaha but them's the breaks.  This is one of only three shots that were OK...  


Not the best but still sweet :)
Have a great day!

July 26, 2012

Card Me Thursday - Simple Squares

Hi Folks,

Here's another quick and easy card to make...


Using a blue side fold card as a base, I embossed a white piece of card for the front.  I then cut three squares of pattern paper for the middle, mounted on pop dots to give a bit of dimention.  A piece of blue ribbon tied in a bow to finish off the front.  Super quick and very easy to do but looks great!

Have a great day!

July 25, 2012

Welcome...

Nothing quite as precious as a new born babe... welcome to the family Mia Samantha!


Have a great day!

July 23, 2012

It's all in the props...

Hi Folks,

It's been a busy household of late, with the arrival of Gran baby #2 just over a week ago.  I decided to get my butt into gear and take photos of this little wee one before she is no longer a wee one...lol!  So I have been busy prepping for a photo shoot, scouring the web for poses and info on 'How to Baby Photography', as well as practicing with my camera...phew!

Oh and gathering lots of goodies I can use as props...


Aren't those headbands darling and I crocheted the hats myself!  Plus I'm in the process of making little frilly pants as well...hehehe, but I'll save those photos for another day! 

I've timed the photo shoot for next Monday so fingers crossed the weather is nice.  I'm just a little bit nervous as I soooo what my photos to be worthy of putting on a wall... wish me luck!

Have a great day!

July 19, 2012

Card Me Thursday - Love Defined

Hi Folks,

Life is returning to normal a little bit, which means I am hoping to get back in my craftroom...soon!  So today's card is one I did for a challenge last month over at MFT, which nicely coincided with my 27th wedding anniversary at the end of June.  I've made cards for hubs for the past few years but this was the first one I have truly been happy with.


I used black card as the base, a white card matt - distressed and inked with Brushed Corduroy Distress Ink, green card matt - distressed and inked and paper from the London Market collection (love this one). The doilie is a MFT die - stamped and inked. The hearts I cut with my Silhouette Cameo - sanded and inked.  The Life in Abundance stamp on the tag at the side is from MFT as well.  To finish off the card I attached a flattened fabric rose bud with a brad.

Needless to say hubs loved the card and I have now set the bench mark higher for next year's card...lol!

Have a great day!

July 17, 2012

Storage Solution for flowers

Hi Folks,

I don't know about you but I am always buying craft items and putting them into boxes or tins or bags, then forget I have them :( 

I recently made a purchase of some gorgeous Prima flowers from a new online store and when I received them I just couldn't put them in a box, they were way too pretty and deserve to be looked at... so what to do? 

I have a cork board on the wall of my craftroom that WAS home for my Twelve Tags of Christmas 2011, I figured this would be the perfect place to put all my pretty flowers.  The board is in good view of my craft desk, so when I'm working on a project I don't have to look far for that perfect flower...lol.


I'm so happy I found a good use for the board and it looks sooooo pretty with all those flowers. 

Where do you have your stash of flowers?  Box, tin, bag or are they on display too?

Have a great day!

July 12, 2012

Card Me Thursday - Quick Flower Card

Hi Folks...

Welcome to another Card Me T-day!  I have to say this was by far the easiest card I have made... and ok so maybe I cheated a bit by using pre-made flower embellishments... hehehehe!


The card was cut from patterned cardstock, a label die cut for the front inked of course and the pre-made flower embellishments... TA-DAAA!  The card was complete in like 2 minutes :)

Have a great day!

July 05, 2012

Card Me Thursday - Enjoy the Journey!

I tell ya some weeks I'm on the ball and then others I just drop the ball...hahahahaha.  This card I made originally for T!m Holtz 12 Tags Challenge way back in April o.O, needless to say I didn't submit it...doh! 

I love, love, love the texture on this card... it's been grunged, embossed, inked and stamped. 


Have a great day!

July 03, 2012

Cupcake Wrapper Freebie

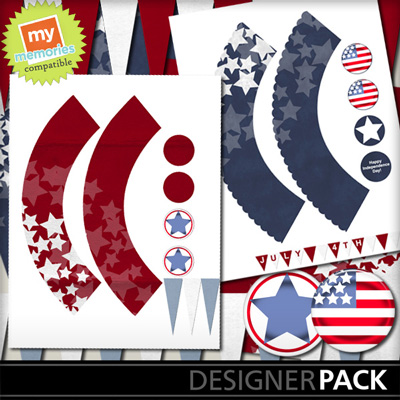
The wonderful folks over at MyMemories have another great FREEBIE for you today... super cute cupcake wrappers!


GRAB IT HERE: http://www.mymemories.com/store/share_the_memories_kit_1

They have even included the tut below on how to not only put the wrappers together but how you can customize it to your hearts content using the MyMemories Suite Software.

Don't have MyMemories Suite yet? Take a look HERE when you go through the checkout use coupon code: STMMMS22909 and get $10 off My Memories Suite (you get it for $29.95 instead of $39.95) AND you also get a $10 gift certificate to use in their online store!
Cupcake Liner Tutorial

1.  Purchase or Bake and Cool Cupcakes.  If cupcakes are frosted, place in refrigerator and chill cupcakes before putting liners on.  It is easier to put liners on if the frosting is cold.
2.  Print your Cupcake liner templates on cardstock and gather supplies.  Each printed page will have enough supplies for 2 cupakes. (Recommended supplies: small craft scissors, tape, foam squares, 1.25" circle punch, toothpicks and ribbon)

3.  Using the scissors cut along outside line.
TIP: Use a 1.25" circle punch to cut out the toppers.  If printed at full size, the circles should be exactly the same size.

Cut out Pieces


4.  Wrap liner around cupcake and tape at seam.
TIP: If using a smaller cupcake, just wrap around at the desired height. You can place a smaller cupcake at the bottom of the liner or make it tighter and wrap it around at the top.
Wrap liner around cupcake

5.  Using foam squares or tape, attach the front and back circles together to form the topper. Insert toothpick between the circles.
Topper instructionsCupcake topper

6. Add ribbon onto the toothpick or at the bottom of the front circle, if desired.
Add Ribbon

7.  Insert toothpick into cupcake.  Enjoy the finished cupcakes and share.  Don't forget to use your imagination.  The possibilites are endless!

Finished cupcakes

Using MyMemories Software to Customize your Cupcake Liners

1. Download template file and install it into your software
2. Using MyMemories Suite, choose Create Album From Designer Template and find your project
3. Now you can print and enjoy the provided template, or customize it with your own papers and embellishments.

TIP:
You can right-click on the white guide and lock it in place to keep it from moving while you are working. Make sure this is the top layer of your project before printing.

Instead of adding the paper as a background paper, you can add it as an embellishment so that you can move the paper around.  This is especially useful when using papers with stripes or circles, so you can decide which part of the paper you want to use.

Once it is added as an embellishment, you can now select the paper and move it into the position you want it. 

Just SAVE and PRINT on cardstock!
 
Have a great day!